Mastering the Art of Infrared Photography: Essential Tips
GoogleAds
In the world of photography, infrared photography stands out as a unique and intriguing genre that captures the world in a whole new light – quite literally. Mastering the art of infrared photography requires a keen eye, technical know-how, and a bit of experimentation. In this article, we will explore some essential tips to help you unlock the full potential of this captivating form of photography.
Introduction
Infrared photography is a unique and captivating form of art that allows photographers to capture stunning and surreal images. Mastering this technique requires a combination of technical know-how, creativity, and patience. In this post, we will explore some essential tips to help you elevate your infrared photography skills to the next level.
One of the key elements in infrared photography is choosing the right camera equipment. Not all cameras are capable of capturing infrared light, so it’s important to do your research and invest in a camera that has been modified for infrared photography. Look for a camera that has a high sensitivity to infrared light and produces sharp images with minimal noise.
When shooting in infrared, it’s crucial to pay attention to the lighting conditions. Infrared light behaves differently than visible light, so you’ll need to experiment with different lighting situations to achieve the desired effect. Keep in mind that infrared light is most abundant during the middle of the day when the sun is high in the sky, so plan your shoots accordingly.
Composition is another crucial aspect of mastering infrared photography. Experiment with different angles, perspectives, and framing techniques to create dynamic and visually interesting images. Consider incorporating elements such as reflections, textures, and patterns to add depth and dimension to your photos.
Post-processing is the final step in the infrared photography process, and it can make a significant difference in the final outcome of your images. Use editing software such as Adobe Photoshop or Lightroom to adjust the contrast, saturation, and white balance of your photos. Experiment with different editing techniques to enhance the otherworldly quality of your infrared images.
In conclusion, mastering the art of infrared photography requires practice, experimentation, and a keen eye for detail. By following these essential tips, you’ll be well on your way to creating stunning and captivating infrared images that will leave a lasting impression on viewers. So grab your camera, head out into the field, and start exploring the magical world of infrared photography today.
Understanding Infrared Photography
Mastering the art of infrared photography is a unique and intriguing journey that requires a good understanding of the techniques and equipment involved. Infrared photography captures light that is not visible to the human eye, resulting in surreal and otherworldly images that can evoke a sense of mystery and wonder.
When diving into the world of infrared photography, it is important to have the right equipment. A digital camera that has been modified for infrared photography or a camera that has the ability to capture infrared light is essential. Additionally, using an infrared filter can help enhance the final result of your images.
Composition is key in creating striking infrared photographs. Look for scenes with interesting textures, patterns, and contrast, as these elements can be emphasized in infrared photography. Experiment with different angles and perspectives to add depth and dimension to your images.
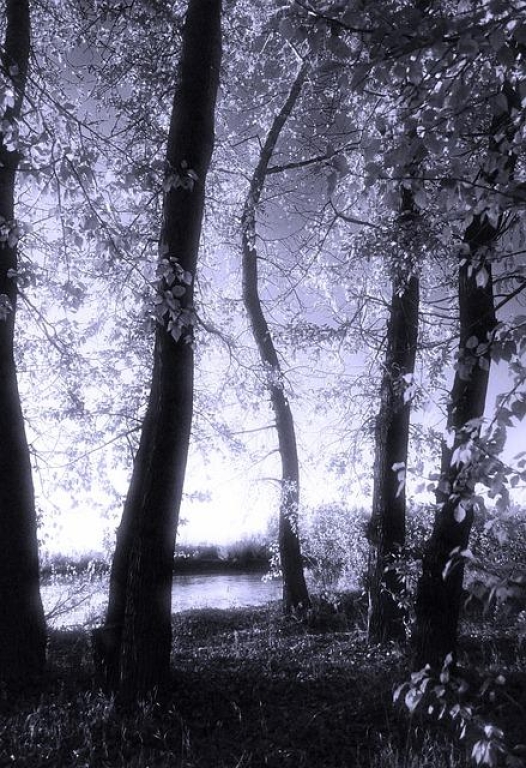
When shooting in infrared, it is important to keep in mind that infrared light behaves differently than visible light. Trees and foliage, for example, will appear white or light pink in infrared photography, while skies can appear dark and dramatic. Embracing these unique characteristics can lead to captivating and thought-provoking images.
Post-processing plays a crucial role in perfecting infrared photographs. Experiment with adjusting the white balance, contrast, and saturation to achieve the desired look. Infrared photography offers endless creative possibilities, so don’t be afraid to experiment and push the boundaries of your creativity.

Choosing the Right Equipment
When it comes to mastering the art of infrared photography, is key. Investing in the proper gear can make a significant difference in the quality of your images. Here are some essential tips to help you select the best equipment for your infrared photography needs:
Camera
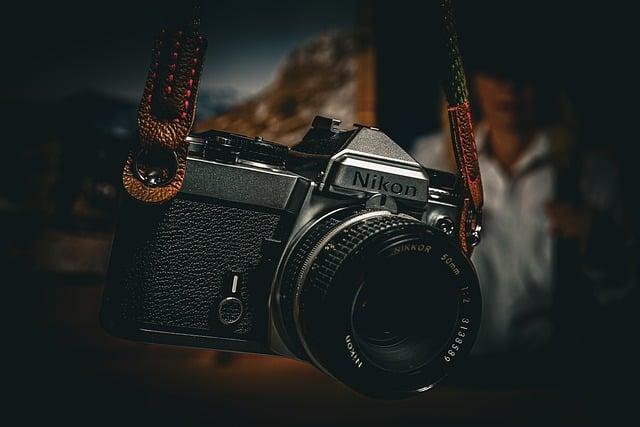
One of the most important pieces of equipment for infrared photography is a camera that is capable of capturing infrared light. Look for a camera that has been converted to shoot in infrared, or one that has the ability to do so with the use of infrared filters. Some popular options include the Nikon D850, Canon EOS R, and Sony A7R III.
Lens
When choosing a lens for infrared photography, keep in mind that different lenses may produce varying results. It is recommended to use a lens that is known for producing sharp and crisp images, as infrared photography tends to enhance details and textures. Some popular lens choices for infrared photography are the Canon EF 50mm f/1.8, Nikon AF-S DX NIKKOR 35mm f/1.8G, and Sony FE 85mm f/1.8.
Filters
Filters are essential for controlling the amount of infrared light that reaches your camera’s sensor. Infrared filters come in different strengths, typically ranging from 590nm to 850nm. A popular choice for infrared photography is the 720nm filter, which produces a classic infrared look with deep blacks and glowing whites.
Tripod
Since infrared photography often requires longer exposure times, a sturdy tripod is a must-have accessory. Look for a tripod that is lightweight yet durable, with adjustable legs and a secure mounting plate. This will help you capture sharp and steady images, even in low light conditions.
Accessories
Don’t forget to invest in accessories such as remote shutter releases, extra batteries, and a camera bag to keep your gear safe and organized. These small but essential items can make a big difference in your overall photography experience and help you capture stunning infrared images with ease.
Setting Up Your Camera
When it comes to mastering the art of infrared photography, correctly is crucial. Making sure your equipment is properly configured will help you achieve the best results and bring out the unique qualities of this style of photography.
One of the first steps in for infrared photography is to attach an infrared filter to your lens. This filter blocks out visible light and allows only infrared light to pass through, giving your photos that distinctive infrared look. There are many different types of infrared filters available, so be sure to choose one that is compatible with your camera and lens.
Next, you’ll need to adjust your camera’s white balance settings. Since infrared light behaves differently than visible light, your camera’s white balance settings may need to be customized for infrared photography. Consult your camera’s manual to find the best white balance setting for capturing infrared images.
When shooting in infrared, it’s important to use a tripod to prevent camera shake and ensure sharp, clear images. Infrared light can be challenging to work with, so having a stable base for your camera is essential. Additionally, using a remote shutter release can help minimize vibrations and further improve the quality of your infrared photos.
Experimenting with different exposure settings is key to finding the right balance for your infrared images. Since infrared light is outside the visible spectrum, it can be tricky to gauge the correct exposure. Try taking test shots at different shutter speeds and apertures to see what works best for the lighting conditions and subject matter you’re shooting.
Mastering Composition Techniques
Infrared photography is a unique and captivating form of art that can produce stunning and surreal images. Mastering the art of infrared photography requires a good understanding of composition techniques to create visually pleasing photographs that stand out. Here are some essential tips to help you take your infrared photography to the next level:
1. Choose the Right Subject: When shooting in infrared, certain subjects work better than others. Look for subjects with interesting textures, contrast, and details to create compelling images. Trees, landscapes, and architecture are popular subjects for infrared photography.
2. Experiment with Angles and Perspectives: Don’t be afraid to get creative with your composition. Try shooting from different angles and perspectives to add visual interest to your photos. Experiment with low angles, high angles, and unconventional viewpoints to create unique and dynamic compositions.
3. Play with Light and Shadows: Infrared photography can produce striking images with dramatic lighting effects. Pay attention to how light and shadows interact in your composition. Use the unique properties of infrared light to create interesting patterns and contrast in your photographs.
4. Use Leading Lines and Symmetry: Incorporating leading lines and symmetry into your composition can help guide the viewer’s eye through the image and create a sense of balance. Look for natural or man-made elements that can be used as leading lines or create symmetrical compositions for a strong visual impact.

Understanding Post-Processing
Infrared photography is a unique and captivating genre that can produce stunning and surreal images. However, the key to creating impactful infrared photos lies not only in the capture process but also in the post-processing stage. techniques is essential for mastering the art of infrared photography and bringing out the full potential of your images.
One of the most important aspects of infrared post-processing is channel swapping. Infrared light behaves differently than visible light, so swapping the red and blue channels can help enhance contrast and bring out details in your infrared photos. Experimenting with different channel combinations can allow you to achieve different looks and effects in your images.
Another crucial step in infrared post-processing is adjusting the white balance. Since infrared light is outside the visible spectrum, traditional white balance settings may not work effectively for infrared images. Manually adjusting the white balance to cool or warm tones can help achieve the desired look and mood in your photos.
Adding a touch of creative editing can also elevate your infrared images to the next level. Experimenting with techniques such as split toning, selective color adjustments, and adding gradient filters can help enhance the mood and atmosphere of your infrared photos. Don’t be afraid to get creative and push the boundaries of traditional editing techniques.
Lastly, don’t underestimate the power of black and white conversion for your infrared images. Converting your infrared photos to black and white can help emphasize textures, shapes, and contrast, resulting in striking monochromatic images. Experiment with different black and white conversion methods to find the one that best suits your artistic vision for your infrared photographs.
By mastering the art of post-processing in infrared photography, you can unlock the full potential of your images and create stunning and captivating visuals that stand out from the crowd. Experiment with different techniques, get creative with your editing, and don’t be afraid to push the boundaries of traditional infrared processing to create truly unique and remarkable photos.
Troubleshooting Common Issues
Infrared photography is a fascinating technique that can produce stunning and surreal images. However, like any form of photography, it comes with its own set of challenges and common issues that can arise. By mastering the art of infrared photography, you can create breathtaking images that stand out from the crowd.
One common issue that photographers face when shooting in infrared is the presence of hot spots. These are areas in the image where the infrared light is too concentrated, resulting in bright white spots that can be distracting. To avoid hot spots, it is essential to use a quality infrared filter that is specifically designed for your camera model. Additionally, try to shoot in areas with even lighting to minimize the risk of hot spots appearing in your images.
Another common issue that photographers encounter is color distortion in their infrared images. Infrared light can produce unique color tones that may not always accurately represent the scene you are photographing. To combat color distortion, consider converting your images to black and white to emphasize the unique contrast and textures that infrared photography can offer.
Focus can also be a challenge when shooting in infrared, as the wavelength of infrared light is different from visible light. This can result in out-of-focus images if your camera is not properly calibrated for infrared photography. To ensure sharp focus in your infrared images, it is essential to manually focus your lens and use live view to fine-tune your composition.
Lastly, post-processing is a crucial step in mastering the art of infrared photography. Fine-tuning the contrast, brightness, and sharpness of your images can help bring out the unique qualities of infrared light. Experiment with different editing techniques, such as adjusting the white balance and applying color filters, to create truly captivating infrared images that showcase your artistic vision.
Exploring Creative Possibilities
Mastering the art of infrared photography can open up a whole new world of creative possibilities for photographers. By capturing the invisible light spectrum, this unique technique allows for surreal and otherworldly images that can truly stand out.
Here are some essential tips to help you dive into the world of infrared photography:
- Invest in the right equipment: To capture infrared light, you will need a camera that has been modified to allow infrared light to pass through to the sensor. Alternatively, you can use an infrared filter on your lens to achieve a similar effect.
- Choose the right subjects: Infrared photography works best with subjects that have interesting textures, such as foliage, landscapes, or architecture. Experiment with different subjects to see what works best for you.
- Experiment with different settings: Infrared photography requires some trial and error to get the perfect shot. Play around with different aperture, shutter speed, and ISO settings to achieve the desired effect.
One of the key elements of mastering infrared photography is understanding how different colors will be rendered in your images. Infrared light can cause foliage to appear white, while blues and reds can appear dark or black. Experimenting with color channels in post-processing can help you achieve the desired look for your images.
| Color | Rendering in Infrared |
|---|---|
| Green foliage | Appears white |
| Blues and reds | Appear dark or black |
Q&A
Q: What is infrared photography and how does it differ from traditional photography?
A: Infrared photography involves capturing light that falls outside the visible spectrum, resulting in unique and surreal images. This differs from traditional photography, which focuses on capturing visible light.
Q: What equipment is needed for infrared photography?
A: To capture infrared images, a camera that has been modified to allow infrared light to pass through the sensor is required. Additionally, infrared filters or lenses may be used to enhance the effects of the infrared light.
Q: What are some tips for achieving great results in infrared photography?
A: To master the art of infrared photography, it is important to experiment with different settings, compositions, and lighting conditions. Additionally, shooting in RAW format and using post-processing techniques can help enhance the final image.
Q: How can infrared photography be used creatively?
A: Infrared photography can be used creatively to capture unique landscapes, architecture, and portraits. The infrared light can reveal hidden textures and patterns that are not visible to the naked eye, creating stunning and otherworldly images.
Q: What are some common mistakes to avoid in infrared photography?
A: Some common mistakes to avoid in infrared photography include overexposing or underexposing the image, not adjusting white balance settings, and not using a tripod for long exposure shots. It is important to practice and experiment to learn how to best capture the beauty of infrared light.
To Conclude
In conclusion, mastering the art of infrared photography requires patience, practice, and a keen eye for detail. By following the essential tips outlined in this article, photographers can unlock the full creative potential of this unique and captivating form of image-making. Whether capturing stunning landscapes or exploring abstract compositions, infrared photography offers endless possibilities for artistic expression. With dedication and experimentation, photographers can take their work to new heights and create truly mesmerizing images that stand out from the crowd. So grab your camera, explore the world through a new lens, and watch as your infrared photography skills reach new levels of mastery.
GoogleAds