Mastering Panoramic Photography: Tips for Capturing Stunning Landscapes
GoogleAds

Panoramic photography offers a unique way to capture the vastness and beauty of landscapes, allowing viewers to immerse themselves in the scene. Mastering this technique requires patience, practice, and an eye for composition. In this article, we will provide tips and tricks for capturing stunning panoramic images that will leave your viewers in awe. Whether you’re a beginner looking to improve your skills or an experienced photographer seeking to take your work to the next level, these tips will help you elevate your panoramic photography game.
Introduction
Are you looking to take your landscape photography to the next level? Panoramic photography is a great way to capture the beauty of expansive landscapes in a single frame. With the right techniques and tips, you can create stunning panoramic images that will wow your viewers.
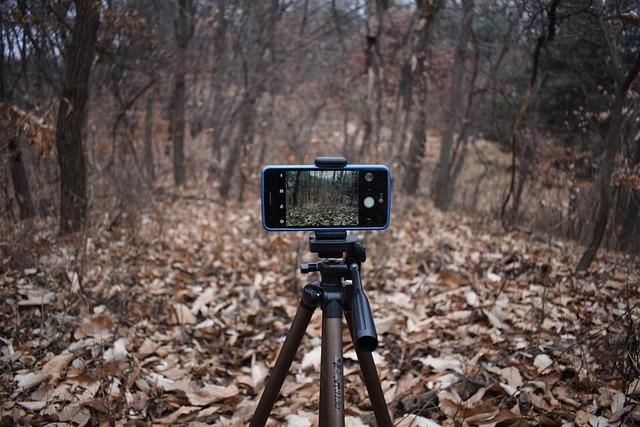
One key tip for mastering panoramic photography is to use a sturdy tripod. A tripod will help ensure that your camera remains steady throughout the entire panorama, resulting in a sharp and clear image. Additionally, using a tripod will make it easier to align your shots and maintain a consistent composition.
Another important tip is to shoot in manual mode. This will give you full control over your camera settings, such as aperture, shutter speed, and ISO. Manual mode allows you to adjust these settings to achieve the desired exposure and depth of field for your panorama.
When shooting a panorama, it’s crucial to overlap each shot by at least 30%. This will give you more flexibility when stitching the images together in post-processing. Overlapping your shots will also help ensure that there are no gaps or missing areas in your final panorama.
Lastly, pay attention to the lighting and weather conditions when shooting a panoramic image. The golden hours of sunrise and sunset can create stunning light and colors in your landscape. Additionally, interesting cloud formations or weather patterns can add drama and depth to your panoramic shots.
Choosing the Right Equipment
Equipment Essentials for Panoramic Photography
When it comes to capturing breathtaking landscapes in panoramic photography, having the right equipment is essential. Here are some tips on choosing the right gear to master the art of panoramic photography:
1. Camera
- Full-frame DSLR or mirrorless camera for high-quality images
- Wide-angle lens (16-35mm) for capturing expansive landscapes
- Tripod to keep your camera steady for long exposures
2. Remote Shutter Release
Using a remote shutter release will help minimize camera shake and ensure sharp images. This is crucial for capturing detailed panoramic shots. Make sure to invest in a reliable remote shutter release for your camera.
3. Leveling Base
A leveling base is essential for panoramic photography to ensure your camera is perfectly level when capturing multiple images for a panorama. This will help avoid distortion and misalignment in your final panoramic image.
4. ND Filters
Neutral density (ND) filters are useful for controlling the amount of light entering your camera, especially in bright outdoor conditions. This can help you achieve a balanced exposure when capturing panoramic shots with long exposures.
5. Panoramic Head
A panoramic head is a specialized tripod head designed for capturing seamless panoramic images. It allows you to rotate your camera around the lens’ nodal point, creating distortion-free panoramas with consistent perspective.

Perfecting Composition Techniques
When it comes to capturing stunning landscapes through panoramic photography, there are a few key techniques to keep in mind. To master this art form, consider the following tips:
1. Use a Sturdy Tripod: Stability is crucial when taking panoramic shots, so invest in a high-quality tripod to ensure your camera remains steady throughout the entire process.
2. Find a Strong Focal Point: Identify a captivating focal point in the landscape to center your composition around. This will draw the viewer’s eye in and create a visually appealing image.
3. Pay Attention to Lighting: The quality of light can make or break a panoramic shot. Be mindful of the direction and intensity of the light to achieve the desired mood and atmosphere in your photographs.
4. Overlap Your Shots: To seamlessly stitch your panoramic images together, be sure to overlap each shot by around 30%. This will make the blending process much smoother and result in a more cohesive final image.
| 5. Experiment with Different Perspectives: | 6. Post-Processing: |
|---|---|
| Try shooting from various angles and heights to find the most compelling composition for your landscape. | Use editing software to fine-tune your panoramic images, adjusting colors, contrast, and sharpness to enhance the overall impact of your photograph. |
Taking Advantage of Natural Lighting
Utilizing the Sun’s Natural Glow
One of the key elements in mastering panoramic photography is to take advantage of natural lighting, particularly sunlight. The sun can create stunning effects on landscapes, highlighting textures and bringing out vibrant colors. To make the most of natural lighting, aim to shoot during the golden hours – the first hour after sunrise and the last hour before sunset. This time of day offers soft, warm light that can add a magical quality to your panoramic shots. Be mindful of the direction of the sunlight and how it interacts with the landscape you are capturing.
Positioning Yourself for the Best Angle
When shooting landscapes, the angle at which you position yourself can make a huge difference in the overall quality of your panoramic photographs. Experiment with different vantage points to find the most compelling composition. Consider using leading lines to draw the viewer’s eye into the scene, or framing the landscape with interesting foreground elements. By carefully choosing your shooting angle, you can create visually striking panoramic images that captivate viewers.
Adjusting Your Camera Settings
Creating stunning panoramic landscapes also involves mastering your camera settings. To achieve sharp, well-exposed images, make sure to set your camera to a narrow aperture (such as f/8 or higher) to ensure maximum depth of field. Additionally, consider using a low ISO setting to reduce noise in your photos. Experiment with different shutter speeds to capture the movement of clouds or water in the landscape. By fine-tuning your camera settings, you can enhance the visual impact of your panoramic photography.
Choosing the Right Equipment
Having the right equipment can greatly enhance your ability to capture stunning panoramic landscapes. Consider investing in a sturdy tripod to keep your camera steady and ensure sharp, high-quality images. A wide-angle lens is also essential for capturing expansive landscapes in a single frame. If you’re shooting in difficult lighting conditions, such as bright sunlight or low light, using a neutral density filter can help balance exposure and create more dynamic photos. By choosing the appropriate equipment for your panoramic photography, you can elevate the visual impact of your images.
Post-Processing Techniques for Panoramic Photography
After capturing your panoramic landscapes, post-processing plays a crucial role in enhancing the final result. Use editing software such as Adobe Lightroom or Photoshop to fine-tune colors, contrast, and sharpness in your images. Consider stitching multiple images together to create a seamless panoramic view, and use tools like the graduated filter to enhance specific areas of the landscape. Experiment with different editing techniques to bring out the full potential of your panoramic photography and create stunning, captivating landscapes that showcase the natural beauty of the world around us.

Utilizing Tripods and Remote Shutter Releases
Tripods and remote shutter releases are essential tools for capturing stunning panoramic landscapes. By utilizing these accessories, you can ensure sharp, high-quality images that are free from camera shake. When shooting panoramas, it’s crucial to keep your camera steady to avoid any blurriness in the final image.
When setting up your tripod, make sure it is on stable ground and extend the legs fully to prevent any wobbling. Adjust the height and angle of the tripod to get the perfect composition for your panoramic shot. Once your tripod is set up, attach your camera securely and make sure it is level using the built-in bubble level or a separate leveling device.
Using a remote shutter release allows you to trigger the camera without physically touching it, further minimizing the risk of camera shake. This is especially important when shooting long exposures or multiple shots for a panorama. With the remote shutter release, you can capture the image with precision and accuracy.
Experiment with different shutter speeds and apertures to achieve the desired effect in your panoramic shots. For landscapes, a smaller aperture (higher f-stop) is often preferred to ensure maximum sharpness from the foreground to the background. Adjusting the shutter speed can also create interesting effects, such as smooth water or moving clouds.
Overall, mastering panoramic photography requires practice, patience, and attention to detail. By , you can elevate your landscape photography to new heights and capture breathtaking panoramas that will impress viewers and showcase the beauty of the world around us.

Post-Processing Techniques for a Polished Finish
When it comes to capturing stunning panoramic landscapes, post-processing techniques play a crucial role in achieving a polished finish. By mastering these techniques, you can take your panoramic photography to the next level and create images that truly stand out.
One essential post-processing technique for achieving a polished finish is to ensure proper exposure and white balance. By adjusting these settings in post-production, you can enhance the overall look and feel of your panoramic images, bringing out the true beauty of the landscape.
Another important aspect of post-processing is sharpening and noise reduction. By using tools such as the sharpening filter and noise reduction feature, you can improve the clarity and sharpness of your images, making them appear more professional and visually appealing.
Color correction is also key in achieving a polished finish. By adjusting the saturation, hue, and contrast of your images, you can enhance the colors of the landscape and create a more dynamic and vibrant composition.
Lastly, don’t underestimate the power of cropping and straightening in post-processing. By cropping out distractions and straightening horizons, you can create a more focused and visually pleasing panoramic image that truly captures the essence of the landscape.

Tips for Creating Seamless Panoramas
When it comes to creating stunning panoramic photographs, attention to detail is key. To master the art of panoramic photography and capture breathtaking landscapes, follow these tips:
Shoot in Manual Mode
Set your camera to manual mode to have full control over exposure settings. This will ensure consistency across each frame of your panorama.
Use a Tripod
A tripod is essential for creating seamless panoramas. It stabilizes your camera and ensures that each frame aligns perfectly for a smooth final image.
Overlap Frames
Overlap each frame by at least 30% to give your editing software enough information to seamlessly merge the images together.
Check Your Horizon Line
Make sure your horizon line is straight in each frame to avoid crooked panoramas. Use the grid feature on your camera to help guide you.
Experiment with Different Perspectives
Don’t be afraid to experiment with different angles and perspectives when shooting panoramas. This can add depth and interest to your final image.

Common Mistakes to Avoid
When it comes to capturing stunning panoramic landscapes, there are a few common mistakes that beginner photographers often make. By being aware of these mistakes and taking steps to avoid them, you can greatly improve the quality of your panoramic photos.
1. Not using a tripod: One of the biggest mistakes that photographers make when taking panoramic photos is not using a tripod. A tripod is essential for keeping your camera steady and ensuring that all of your photos line up correctly when stitched together.
2. Ignoring the rule of thirds: Another common mistake is ignoring the rule of thirds. By placing the horizon line in the center of your photo, you can make your panoramic landscapes look unbalanced and uninteresting. Instead, try to use the rule of thirds to create a more visually appealing composition.
3. Using the wrong settings: It’s important to use the right settings when taking panoramic photos. Avoid using a high ISO, as this can introduce noise into your photos. Instead, use a low ISO and a narrow aperture to ensure sharp, clear images.
4. Not checking for distractions: Before taking a panoramic photo, take a moment to scan the scene for any distractions that may ruin the composition. Look out for things like power lines, trash cans, or other objects that could detract from the beauty of the landscape.
Q&A
Q: What equipment do I need to capture panoramic photos?
A: To capture stunning panoramic photos, you’ll need a camera with manual settings, a sturdy tripod, and a wide-angle lens.
Q: What is the best technique for capturing panoramic images?
A: To capture panoramic images, it’s best to shoot in landscape mode, overlap each shot by about 30%, and ensure that the exposure and white balance are consistent throughout.
Q: How can I enhance my panoramic photos in post-processing?
A: In post-processing, you can stitch the images together using editing software, adjust the exposure and contrast, and make any necessary color corrections to enhance your panoramic photos.
Q: Are there any common mistakes to avoid when shooting panoramic photos?
A: Some common mistakes to avoid when shooting panoramic photos include moving the camera while shooting, using automatic settings, and not paying attention to the horizon line.
Q: How can I take my panoramic photography to the next level?
A: To take your panoramic photography to the next level, try experimenting with different perspectives, incorporating leading lines, and including interesting foreground elements to add depth to your compositions.
Key Takeaways
In conclusion, mastering panoramic photography can truly elevate your landscape photography skills and allow you to capture stunning scenes in their full grandeur. By following the tips and techniques outlined in this article, you can take your panoramic shots to the next level and create truly breathtaking images. So grab your camera, venture out into the great outdoors, and start capturing those expansive vistas with confidence and skill. Happy shooting!
GoogleAds


