Mastering Panoramic Photography: Essential Tips for Stunning Wide-Angle Shots
GoogleAds

Panoramic photography has the unique ability to capture sweeping landscapes and immersive scenes in one powerful image, but mastering this art form requires more than simply pressing a button. In this article, we will delve into the essential tips and techniques for taking stunning wide-angle shots that will leave viewers breathless. Whether you’re a seasoned pro or a beginner looking to up your photography game, these insights will help you unleash the full potential of your panoramic shots.
Choosing the Right Equipment for Panoramic Photography
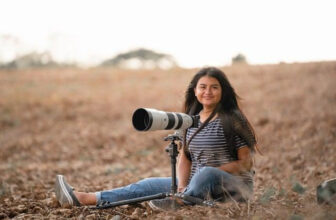
When it comes to panoramic photography, having the right equipment can make all the difference in capturing stunning wide-angle shots. Here are some essential tips to help you master the art of panoramic photography:
Camera: Invest in a camera that has a wide-angle lens to capture the expansive views of panoramic shots. Look for a camera with a high resolution to ensure sharp and detailed images.
Tripod: A sturdy tripod is essential for panoramic photography to keep your camera steady and level. This is crucial for maintaining consistency in each shot and for seamless stitching in post-processing.
Lens: Choose a lens with a focal length of 35mm or wider to capture a wider field of view. A wide-angle lens will help you create dramatic and immersive panoramic shots.
Remote Shutter Release: Using a remote shutter release will prevent camera shake when capturing panoramic shots. This will help you achieve sharp and clear images, especially in low light situations.
Understanding Composition Techniques for Wide-Angle Shots
Wide-angle shots can capture breathtaking panoramic views, but mastering the technique requires a good understanding of composition principles. By utilizing the right composition techniques, you can create stunning wide-angle shots that truly capture the grandeur of a scene.
One essential tip for wide-angle photography is to pay attention to the foreground. Including interesting foreground elements can add depth and dimension to your shot, making the viewer feel like they are a part of the scene. Try incorporating leading lines or objects that draw the eye into the frame.
Another important aspect to consider is the rule of thirds. By placing key elements of your composition along the grid lines or intersections of the rule of thirds, you can create a more visually appealing and balanced image. This is especially crucial for wide-angle shots, as it helps to guide the viewer’s eye through the scene.
Furthermore, be mindful of how you position the horizon line in your wide-angle shots. Placing the horizon too high or too low can make the image feel unbalanced. Aim to position the horizon line at around one-third of the frame to create a harmonious composition that showcases both the sky and the foreground.
Lastly, experiment with different perspectives and angles to find the most compelling composition for your wide-angle shots. Don’t be afraid to get low to the ground or climb to a higher vantage point to capture unique and dynamic perspectives. Remember, the key to mastering wide-angle photography is practice and experimentation.
Mastering Exposure Settings for Capturing Stunning Panoramic Images
When it comes to capturing stunning panoramic images, mastering exposure settings is crucial. By understanding how to properly adjust your camera settings, you can ensure that your wide-angle shots are well-exposed and visually striking.
One essential tip for mastering exposure settings in panoramic photography is to pay attention to your aperture. A smaller aperture (higher f-stop number) will result in a larger depth of field, allowing more of the scene to be in focus. This is especially important when shooting landscapes or cityscapes where you want everything from the foreground to the background to be sharp.
Another key aspect to consider is your shutter speed. A slow shutter speed can result in motion blur, which can add a sense of movement to your panoramic images. On the other hand, a fast shutter speed is ideal for capturing sharp, detailed shots of static subjects like buildings or mountains.
Don’t forget about ISO! Adjusting the ISO setting on your camera can help you control the amount of digital noise in your images. In well-lit situations, a lower ISO will produce cleaner, more detailed shots. However, in low-light conditions, you may need to increase the ISO to ensure proper exposure.
Lastly, don’t be afraid to experiment with different exposure settings to achieve the desired effect in your panoramic images. Take the time to practice with your camera and get comfortable with adjusting aperture, shutter speed, and ISO to create stunning wide-angle shots that truly stand out.

Utilizing Tripods and Leveling Tools for Perfect Panoramas
When it comes to capturing breathtaking panoramic shots, utilizing tripods and leveling tools can make all the difference. These essential accessories help ensure that your wide-angle shots are perfectly aligned and level, resulting in stunning and professional-looking images.
One of the key benefits of using a tripod for panoramic photography is the stability it provides. By keeping your camera steady, you can avoid any unwanted blurriness or distortion in your images. This is especially important when shooting in low light conditions or long exposure settings.
Leveling tools, such as a bubble level or electronic level, are crucial for achieving perfectly straight horizons in your panoramic shots. Ensuring that your camera is level will help prevent any unwanted tilting or skewing in your final images, resulting in a more visually appealing composition.
When setting up your tripod for panoramic photography, it’s important to position it at the right height and angle to capture the desired wide-angle view. Adjust the legs of the tripod to achieve the perfect height, and use the leveling tool to ensure that the camera is perfectly level before taking your shot.
By mastering the use of tripods and leveling tools for panoramic photography, you can take your wide-angle shots to the next level. With the right equipment and techniques, you can capture stunning landscapes, cityscapes, and architectural details with precision and clarity, creating gallery-worthy images that are sure to impress.

Tips for Stitching Panoramic Images Seamlessly in Post-Production
When it comes to capturing stunning wide-angle shots through panoramic photography, the post-production process plays a crucial role in seamlessly stitching together multiple images. Here are some essential tips to help you master the art of stitching panoramic images with precision and finesse:
1. Use a reliable stitching software: Investing in a high-quality stitching software can make a significant difference in the final result of your panoramic images. Popular options like Adobe Photoshop, PTGui, and Hugin offer advanced features for aligning and blending images seamlessly.
2. Overlap images for better alignment: To ensure a smooth transition between individual images, make sure to overlap them by at least 20-30%. This overlap provides the stitching software with enough visual cues to align the images accurately and reduce the risk of distortions.
3. Pay attention to perspective and distortion: Adjusting the perspective and correcting any distortions in each individual image before stitching can greatly improve the overall quality of the panoramic shot. Use tools like the Transform and Lens Correction features in Photoshop to fine-tune each image.
4. Mind the lighting and color consistency: To maintain a cohesive look across all stitched images, pay close attention to the lighting and color balance. Ensure that the exposure levels and white balance settings match seamlessly to avoid any jarring discrepancies in the final panoramic composition.
5. Experiment with different projection modes: Most stitching software offer various projection modes to display panoramic images, such as cylindrical, spherical, or perspective. Experimenting with different modes can help you find the most visually appealing presentation for your wide-angle shots.

Enhancing Wide-Angle Shots with HDR Techniques
When it comes to capturing stunning wide-angle shots, using HDR techniques can truly enhance the final result. High Dynamic Range (HDR) imaging allows photographers to merge multiple exposures of the same scene to bring out the full spectrum of colors and details. This is especially beneficial when shooting panoramic photos, as it can help balance out the exposure across the entire image.
One essential tip for mastering panoramic photography with HDR techniques is to use a sturdy tripod. A stable base is crucial when taking multiple exposures of the same scene, as any slight movement can result in misaligned photos. Make sure to set up your tripod on even ground and use a remote shutter release or timer to minimize camera shake.
Another key tip is to shoot in RAW format. RAW files contain a wealth of information that can be fully utilized during the post-processing stage. When combining multiple exposures for HDR, having access to the full dynamic range of RAW files allows for better tonal adjustments and color correction.
Experiment with different exposure settings to achieve the desired look for your wide-angle shots. Bracketing your exposures can help you capture a range of highlights and shadows, which can then be merged into a single HDR image. Be mindful of the scene’s dynamic range and adjust your exposure settings accordingly.
don’t forget to fine-tune your HDR image in post-processing. Use software like Adobe Lightroom or Photoshop to blend your exposures, adjust contrast and saturation, and make any necessary corrections. With practice and patience, you can master the art of panoramic photography and create stunning wide-angle shots that truly stand out.
Exploring Different Software Options for Panoramic Image Processing
Software Options:
When it comes to processing panoramic images, there are a variety of software options available that can help you create stunning wide-angle shots. Some popular choices include Adobe Photoshop, PTGui, Hugin, and Microsoft ICE. Each of these programs offers unique features and capabilities that can enhance your panoramic photography workflow.
Adobe Photoshop:
One of the most well-known and widely used software options for panoramic image processing is Adobe Photoshop. With its powerful editing tools and wide range of features, Photoshop allows you to stitch together multiple images seamlessly to create a high-quality panoramic shot. Additionally, Photoshop offers advanced color correction and editing capabilities to help you fine-tune your images to perfection.
PTGui:
PTGui is another popular choice among photographers for creating panoramic images. This software offers a user-friendly interface and advanced stitching algorithms that help you seamlessly blend multiple images together. PTGui also provides tools for correcting lens distortion and adjusting image alignment, making it a great option for creating professional-looking panoramas.
| Hugin | Microsoft ICE |
| Advanced stitching algorithms | User-friendly interface |
| Lens distortion correction | Seamless image blending |
| Image alignment tools | Automatic exposure blending |
Choosing the Right Software:
When , it’s essential to consider your specific needs and preferences. Think about the features that are most important to you, such as ease of use, advanced editing capabilities, and compatibility with your existing photography workflow. By choosing the right software for your needs, you can take your panoramic photography to the next level and create stunning wide-angle shots that truly stand out.
Q&A
Q: What is panoramic photography?
A: Panoramic photography is a technique used to capture wide-angle shots that encompass a broad field of view, typically wider than what a standard lens can capture.
Q: What are some essential tips for mastering panoramic photography?
A: Some essential tips for mastering panoramic photography include using a tripod to keep your shots steady, overlapping your images to ensure smooth stitching, and using manual settings for consistent exposure throughout the panorama.
Q: How can photographers create stunning wide-angle shots with panoramic photography?
A: To create stunning wide-angle shots with panoramic photography, it’s important to pay attention to composition, leading lines, and foreground interest. Experimenting with different perspectives and viewpoints can also help create dynamic and captivating panoramic shots.
Q: What equipment is needed for panoramic photography?
A: While it is possible to create panoramic shots with just a camera and tripod, specialized equipment such as panoramic heads and wide-angle lenses can help achieve higher-quality results. Additionally, post-processing software can be useful for stitching together multiple images into a seamless panorama.
Q: What are the benefits of panoramic photography?
A: Panoramic photography allows photographers to capture expansive landscapes and scenes in a single image, providing viewers with a sense of immersion and scale. It can also be a creative and artistic way to showcase a unique perspective of a location or subject.
Key Takeaways
mastering panoramic photography can elevate your photography skills to the next level, allowing you to capture stunning wide-angle shots that will leave your audience in awe. By following these essential tips and techniques, you can take full advantage of the panoramic format and create breathtaking images that showcase the grandeur of your surroundings. So, grab your camera, head out into the world, and start mastering the art of panoramic photography today. Happy shooting!
GoogleAds