Student Project: Make a Straw Rocket
GoogleAds

Create a paper rocket that can be launched from a soda straw – then, modify the design to make the rocket fly farther!
Watch the Tutorial
See below for materials and step-by-step instructions. For more video tutorials and activities like this one, visit Learning Space.
Watch en Español: Seleccione subtítulos en Español bajo el ícono de configuración.
In this episode of Learning Space, you’ll learn how to create a paper rocket that can be launched from a soda straw – then, modify the design to make the rocket fly farther! | Watch on YouTube
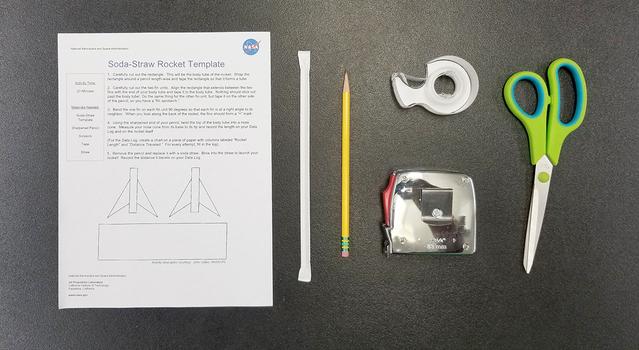
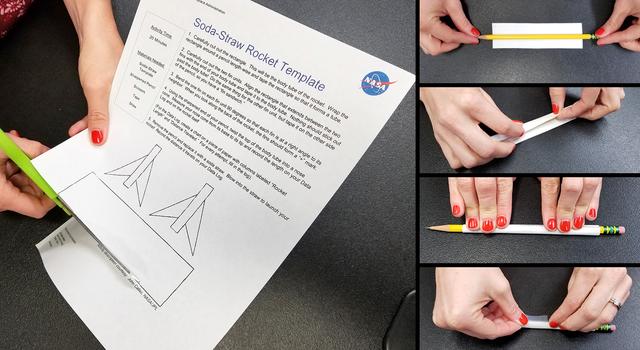
1. Cut out and shape the rocket body
Carefully cut out the large rectangle on the rocket template. This will be the body of the rocket. Wrap the rocket body around a pencil length-wise and tape it closed to form a tube.
If you’re using a reusable metal straw, check that the diameter of the rocket body fits around the straw. If it’s too narrow, wrap the paper around the metal straw instead of the pencil. The rocket body should be loose enough that it slides off the straw, but not so loose that there are large gaps between the straw and paper.
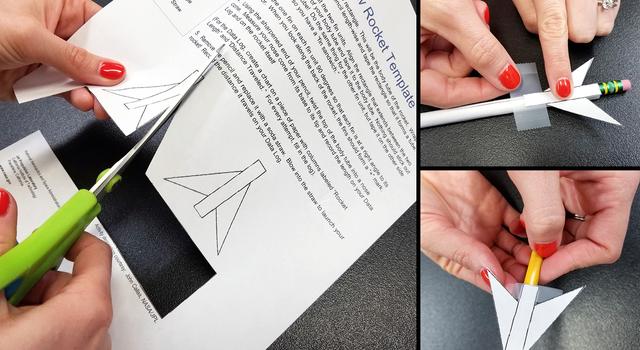
2. Cut out and tape on the fins
Carefully cut out the two fin units. Line up the rectangle in the middle of the fin with the bottom of the rocket body and tape it to the rocket body. Nothing should stick out past the bottom of the rocket body.
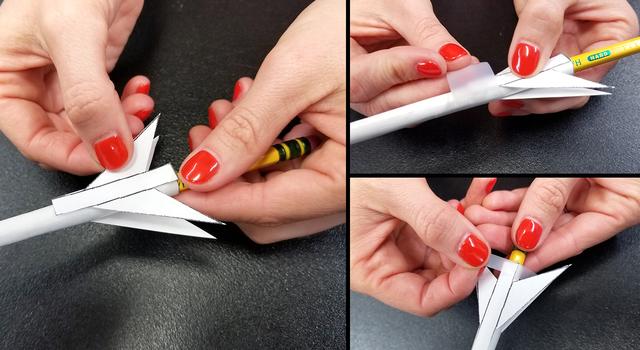
3. Make a fin sandwich
Tape the other fin to the rocket body the same way as above, but on the other side, making a “fin sandwich.”
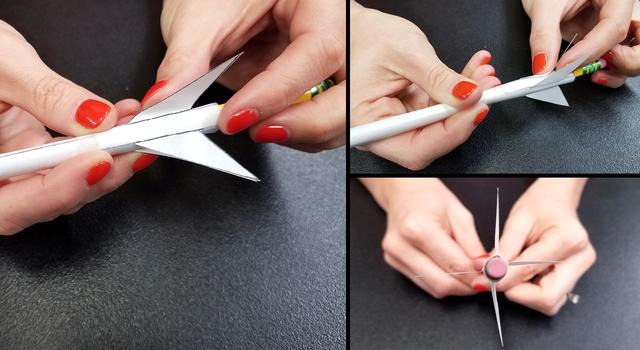
4. Bend the fins
Bend the part of each fin that looks like a triangle 90 degrees so that each fin is at a right angle to its neighbor. Looking from the bottom of the rocket, the fins should look like a +.
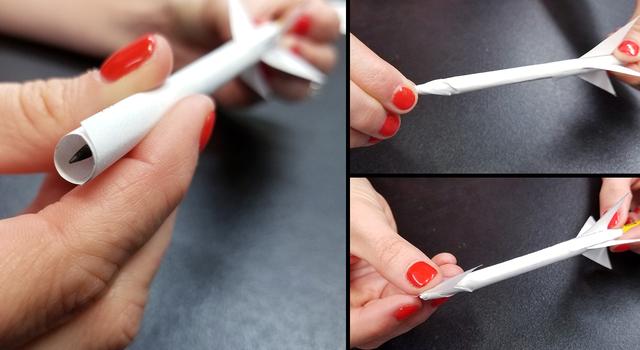
5. Make the nose cone
Twist and pinch the top of the rocket body around the tip of the pencil to create a “nose cone” for your rocket. Tape the nose cone to prevent air from escaping and to keep it from untwisting.
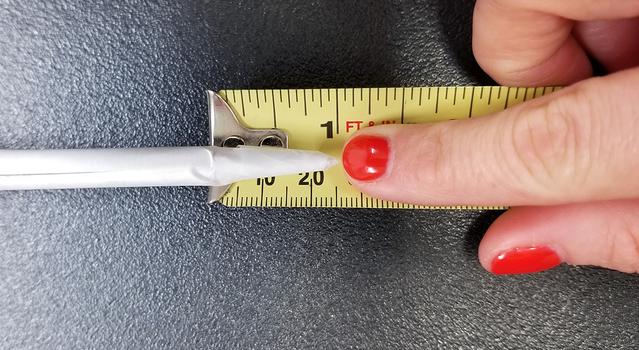
6. Measure the nose cone
Measure the nose cone from its base (right where it starts to narrow) to its tip and record the length in your data log and on the rocket itself.
Once completed, the rocket will be about 13 cm (about 5 inches) tall.
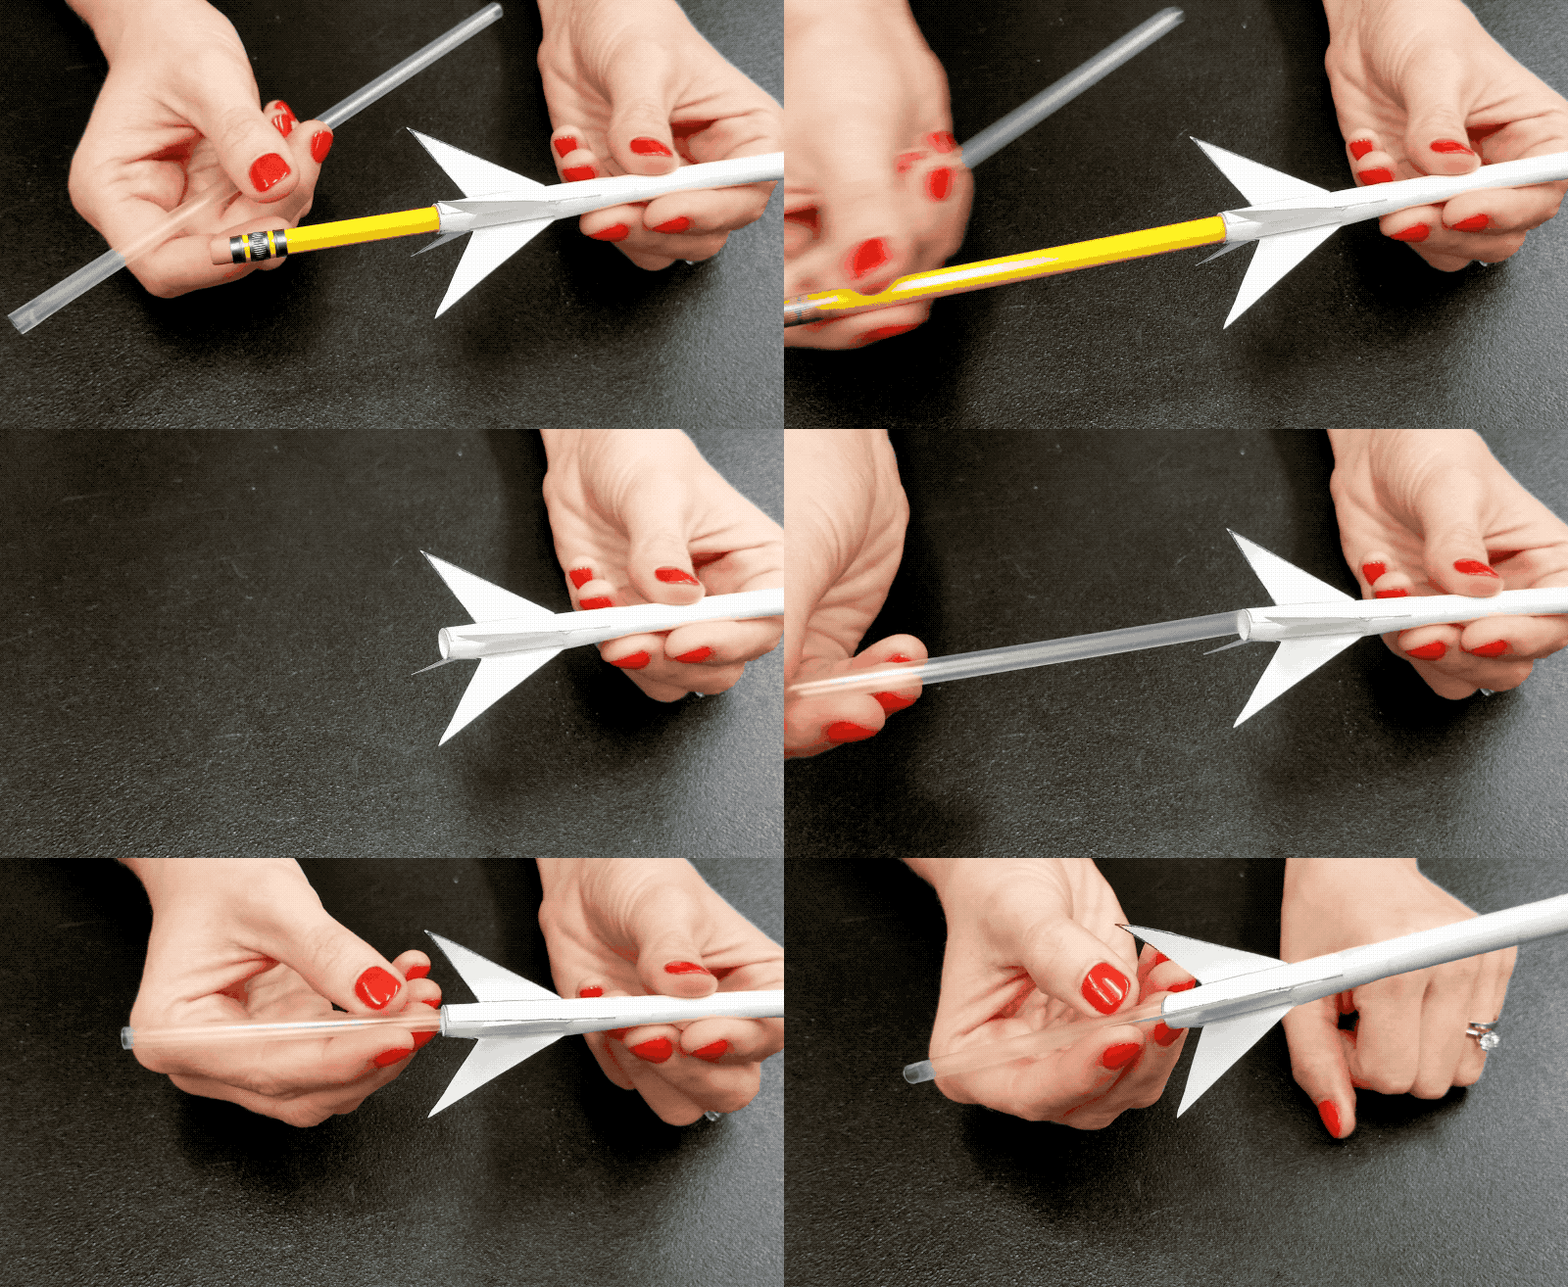
7. Prepare for launch
Remove the pencil and replace it with the soda straw.
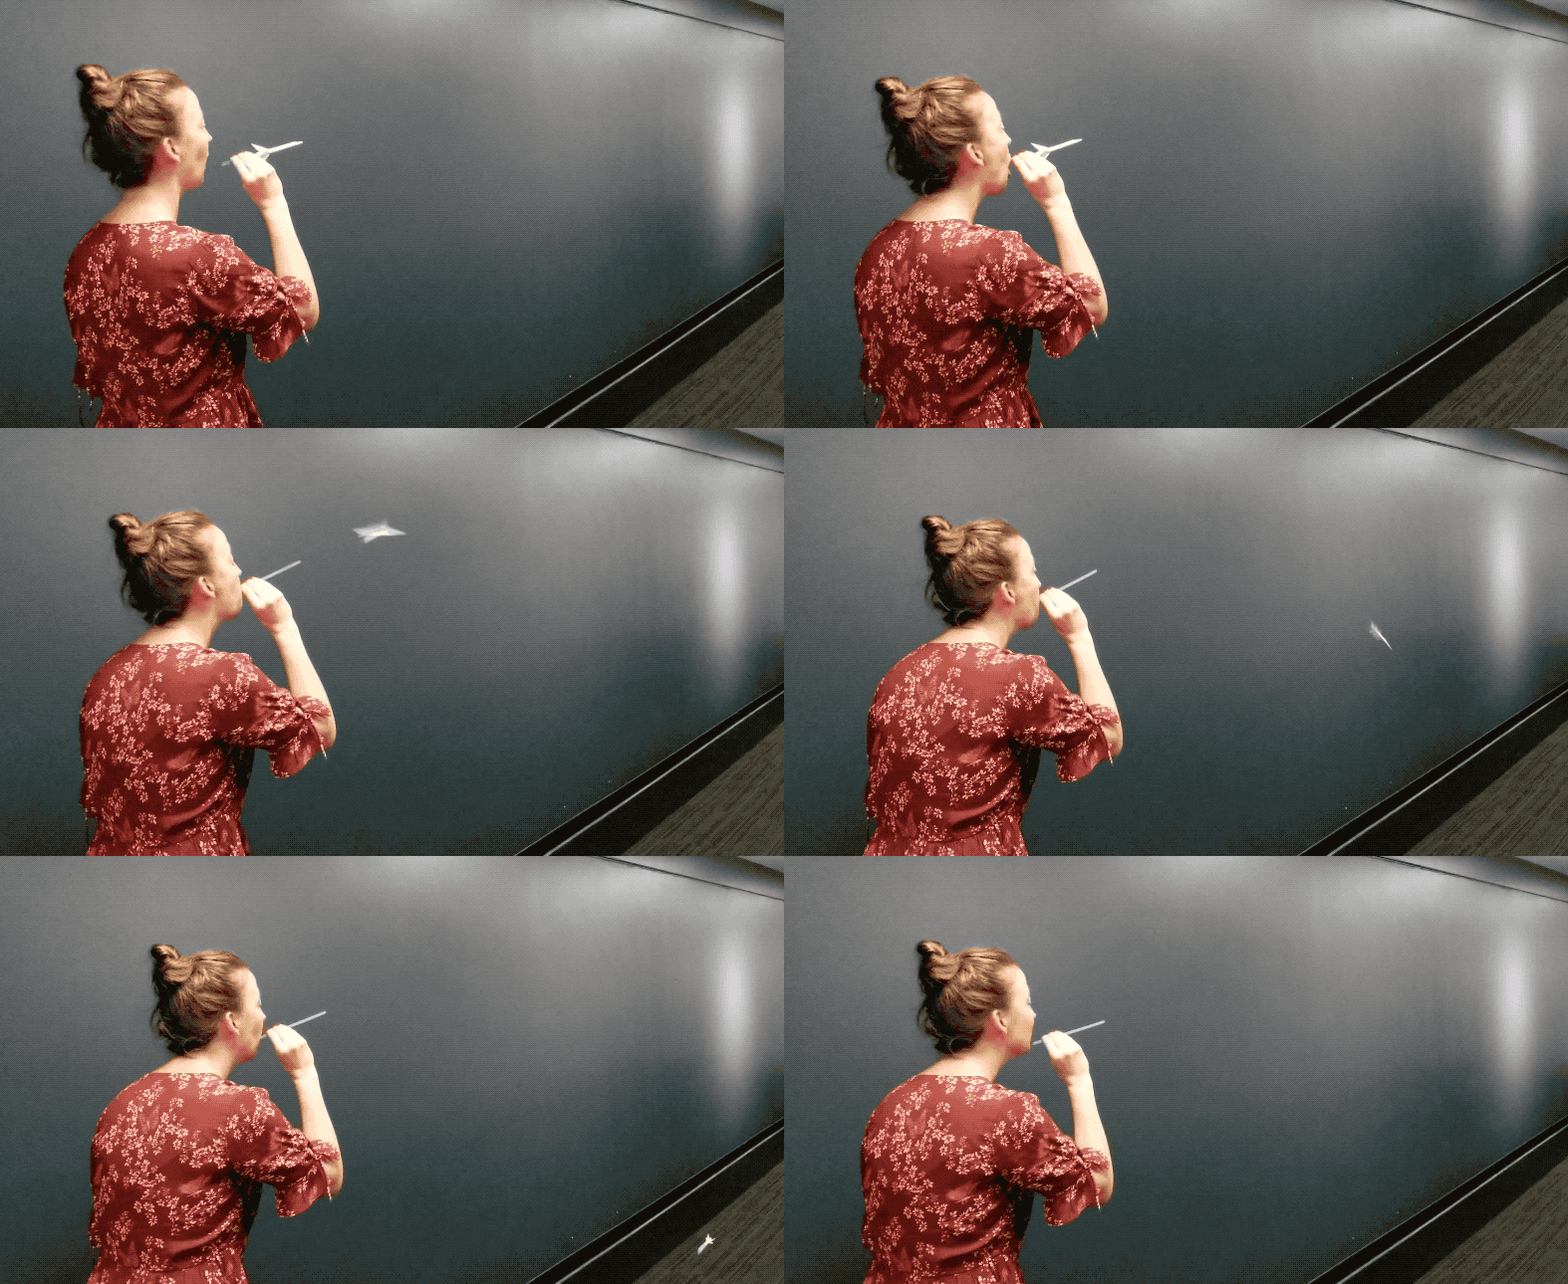
8. Three, two, one … launch!
Be sure that your launch area is clear of people and other hazards. Mark your launch point with tape or an object. Then, blow into the straw to launch the rocket!
9. Measure the distance traveled
Use the meter stick or measuring tape to measure the distance your rocket traveled. Then, record the distance on your data log.
10. Improve your design
Can you make your rocket fly farther? Make new rockets by altering the template. Try different rocket lengths, fin shapes, fin sizes, or fin angles. Repeat steps 6 and 9 for every launch, recording each design change and distance in your data log. Make only one change at a time, so you will know which design changes result in changes in performance.
11. Share it!
Share your design with NASA! Snap a picture or video of your spacecraft and post it on Facebook, Twitter and Instagram using the hashtag #VirtualMoonshot. Be sure to get your parents’ or guardians’ permission before sharing your snaps online – or ask if they can post it for you.
Source : https://www.jpl.nasa.gov/edu/learn/project/make-a-straw-rocket/
Auteur :
Date de Publication : 2019-05-31 18:58:22
Le droit d’auteur pour le contenu syndiqué appartient à la source liée.
GoogleAds


